
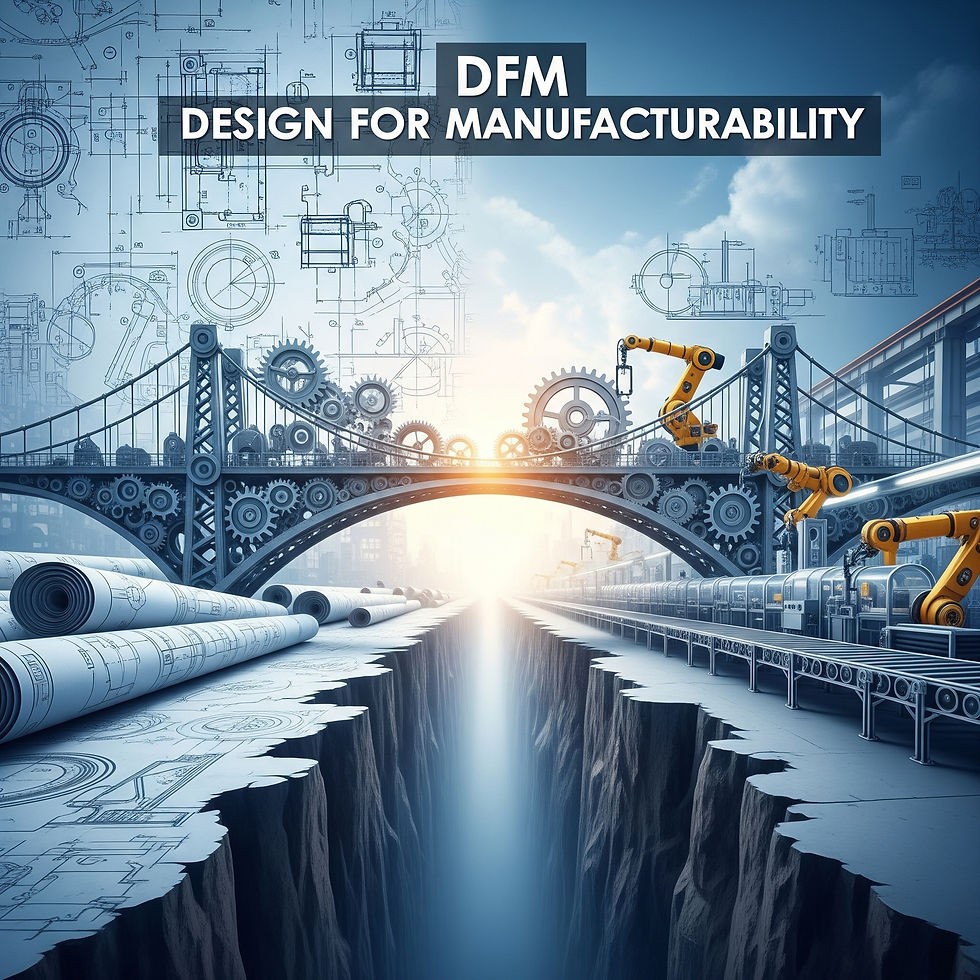
Bridging the Gap: When Design Meets Manufacturing Reality
- Benjamin Cabrera
- Jul 17, 2025
- 12 min read

Updated: Jul 31, 2025
The Chasm Between Vision and Production

You've envisioned a perfect part, a brilliant assembly that solves a complex problem. It looks great on screen, fits precisely in your CAD model. The simulations are green, the stress analyses are spot on, and the virtual prototype moves with elegant precision. You've poured hours, days, perhaps weeks, into refining every curve, every tolerance, every functional interaction. The design software has been your canvas, and the digital realm has been infinitely forgiving, allowing for iterative changes with a few clicks, virtually no material waste, and instant feedback. This is the idealized world of mechanical design, where possibilities seem boundless and constraints are primarily intellectual.
However, the moment your meticulously crafted digital masterpiece leaves the sanctity of your CAD workstation and hits the shop floor, a different reality sets in. Suddenly, your elegant design encounters the messy, tangible truth of manufacturing. That perfectly sharp internal corner? It might be impossible to machine with a standard end mill. The incredibly thin wall you designed for weight savings? It could warp during injection molding. The tight cluster of holes? They might require a specialized, expensive fixture for accurate drilling. This isn't a failure of your design skills, but rather a collision of two distinct, yet inherently intertwined, worlds: theoretical design and practical manufacturability.
This disconnect, this "gap" between what looks good on a screen and what can be efficiently and cost-effectively produced, is a pervasive and often frustrating pain point for mechanical designers. It's a leading cause of project delays, unexpected budget overruns, and quality compromises. In the worst-case scenarios, it can even render a design utterly impossible to produce as initially conceived. The ripple effects are significant, not only pushing back project timelines but also potentially damaging a product's market viability and reputation.
The Designer's Dilemma: Expertise vs. Granular Manufacturing Knowledge

Often, mechanical designers, while undeniably experts in the principles of form, fit, and function, may not have immediate or comprehensive access to the granular details of every conceivable manufacturing process. Their primary training and focus revolve around creating innovative solutions, ensuring structural integrity, optimizing performance, and meeting specific product requirements. This is their core competency, and rightly so. The vast landscape of manufacturing, however, encompasses an astonishing array of processes, each with its own unique set of rules, limitations, and best practices.
Consider the sheer diversity:
Subtractive Manufacturing (Machining): CNC milling, turning, grinding, EDM (Electrical Discharge Machining), laser cutting, waterjet cutting. Each requires specific tooling, material considerations, and programming expertise.
Additive Manufacturing (3D Printing): FDM, SLA, SLS, DMLS, binder jetting. These processes have unique considerations for minimum feature size, overhangs, support structures, and post-processing.
Forming Processes: Stamping, bending, deep drawing, forging, extrusion. Material properties, die design, and spring-back are critical.
Casting Processes: Sand casting, die casting, investment casting. Considerations include draft angles, wall thickness variations, shrinkage, and porosity.
Joining Processes: Welding, brazing, soldering, adhesive bonding, mechanical fasteners. Each impacts assembly time, material compatibility, and strength.
Molding Processes: Injection molding, blow molding, rotational molding, compression molding. These demand a deep understanding of mold design, gate locations, cooling channels, and material flow.
A designer might envision a complex internal channel for fluid flow, perfectly rendered in CAD, assuming it can be 3D printed. But without understanding the maximum print resolution, support removal challenges, or surface finish limitations of the chosen additive process, that elegant channel could become a clogged, rough, and unfunctional nightmare in reality. Similarly, a seemingly simple complex feature that looks straightforward in CAD, like a deep, narrow pocket with tight radii, could require specialized, expensive tooling for CNC machining, leading to excessive material waste due to multiple setups, or introduce insurmountable production challenges such as chatter or tool breakage.
The result of this knowledge gap is predictable: higher production costs due to rework, scrap, or specialized operations; compromised quality due to manufacturing limitations; or, as mentioned, a design that is simply impossible to produce economically or to the required specifications. This not only delays projects, pushing back crucial market entry dates, but can also significantly damage a product's market viability by increasing its final cost or reducing its perceived value.
The Solution: Embracing Design for Manufacturability (DFM)
The antidote to this costly disconnect lies in a proactive and integrated approach:
Design for Manufacturability (DFM). DFM isn't merely a checklist to be consulted at the eleventh hour; it's a fundamental philosophy that advocates for integrating manufacturing considerations into every stage of the design process, not just as an afterthought at the end. It's about shifting from a sequential "design it, then figure out how to make it" mindset to a parallel, holistic "design it with manufacturability in mind" approach.
At its core, DFM is about asking crucial questions early and continuously throughout the design lifecycle.
How will this part actually be manufactured? Is it milled, turned, cast, molded, or 3D printed?
What are the specific process limitations? What are the minimum wall thicknesses for injection molding? What are the standard tool sizes for milling? What are the draft angle requirements for casting?
Can it be molded efficiently? Are there undercuts that require complex, expensive tooling? Can the part be ejected easily?
Are there standard components that can be leveraged to reduce custom fabrication? Fasteners, bearings, off-the-shelf electronic components – using readily available parts often dramatically reduces cost and lead time.
What material will be used, and how does it behave during manufacturing? Is it easy to machine? Does it shrink predictably when molded? Does it deform under heat during welding?
How will the part be inspected and quality-checked? Are there features that are difficult to measure?
How will this part be assembled into the larger product? Can the assembly process be simplified? Are there opportunities for snap-fits or fewer fasteners?
By actively incorporating manufacturing expertise and DFM principles into your design workflow from the outset, you can achieve remarkable results: optimize parts for efficient production, streamline the assembly process, and significantly reduce overall product costs. This isn't about stifling innovation or compromising on desired functionality; rather, it's about channeling creativity within the practical bounds of reality, leading to designs that are not only high-performing but also economically viable and truly ready for the real world.
The Pillars of Effective DFM

Implementing DFM effectively involves several key pillars:
1. Early Collaboration Between Design and Manufacturing Teams
The most critical aspect of DFM is fostering a culture of cross-functional collaboration. This means breaking down the traditional silos between design, engineering, manufacturing, and even procurement. Designers shouldn't be isolated; they should be regularly engaging with manufacturing engineers, machinists, mold makers, and suppliers. These individuals possess invaluable tribal knowledge about what works (and what doesn't) on the shop floor.
Joint Design Reviews: Regular meetings where designers present their concepts to manufacturing experts for feedback and suggestions. This allows for identifying potential issues early on, before significant investment in detailed design.
"Gemba Walks": Designers visiting the manufacturing floor to observe processes firsthand. Seeing how a part is made provides invaluable context and helps designers understand practical limitations and opportunities for improvement.
Shared Tools and Data: Utilizing integrated CAD/CAM systems, Product Lifecycle Management (PLM) software, and digital twins can facilitate seamless data exchange and collaboration.
2. Standardizing Components and Processes
Wherever possible, leverage standard components. Custom-fabricated parts are almost always more expensive and have longer lead times. Standard fasteners, bearings, seals, motors, and off-the-shelf electronic components are readily available, mass-produced, and therefore significantly cheaper.
Similarly, standardize manufacturing processes where appropriate. If your company specializes in CNC machining, design parts that can be efficiently machined using existing equipment and expertise. Avoid introducing new, highly specialized processes unless absolutely necessary, as they often require significant investment and training.
3. Simplifying Part Geometry and Reducing Part Count
Complexity is the enemy of manufacturability and cost.
Simplify Geometry: Remove unnecessary features, cosmetic flourishes that add complexity but little functional value, and overly tight tolerances where not critical. Evaluate if a complex curve can be approximated with simpler arcs and lines without compromising performance.
Reduce Part Count: Explore opportunities to consolidate multiple parts into a single component. This can reduce assembly time, eliminate fasteners, lower inventory costs, and simplify supply chains. For example, a plastic housing with integrated snap-fit features can replace a multi-piece assembly held together with screws. This is a core tenet of Design for Assembly (DFA), which is closely related to DFM.
4. Specifying Appropriate Tolerances and Finishes
Over-specifying tolerances is a common and costly mistake. Every "extra" decimal place, every tighter fit, translates directly into higher manufacturing costs, slower production, and increased scrap rates.
"As Loose as Possible, As Tight as Necessary": Only specify tight tolerances where genuinely critical for function, fit, or performance. Understand the capabilities of your chosen manufacturing process; a standard milling machine simply cannot hold the same tolerances as a precision grinding operation.
Surface Finish: Smooth surface finishes often require additional machining operations or post-processing, increasing cost. Specify only the finish truly required for the application (e.g., aesthetics, friction, fluid flow).
5. Considering Material Selection Early
The choice of material profoundly impacts manufacturability, cost, and performance.
Machinability/Moldability/Printability: Some materials are inherently easier to machine, mold, or print than others. For example, aluminum is generally easier to machine than hardened steel.
Cost and Availability: Consider the raw material cost and its availability in the required forms (e.g., sheet, bar stock, powder).
Mechanical Properties: Ensure the material meets the functional requirements (strength, stiffness, temperature resistance, chemical compatibility).
Post-Processing: Some materials require heat treatment, coating, or other post-processing steps that add cost and complexity.
6. Designing for Assembly (DFA)
While distinct, DFA is a crucial subset of DFM. It focuses on making the assembly process as efficient and error-proof as possible.
Minimize Assembly Steps: Combine parts, use snap-fits, and reduce the number of fasteners.
Standardize Fasteners: Use as few different types and sizes of fasteners as possible.
Ease of Orientation: Design parts that can only be assembled in the correct orientation, or that are symmetrical.
Accessibility: Ensure there is adequate access for tooling and human hands during assembly.
Error Proofing (Poka-Yoke): Implement design features that prevent incorrect assembly.
7. Understanding Tooling and Fixturing Needs
Many manufacturing processes require specialized tooling and fixtures. Thinking about these needs during design can prevent expensive surprises.
Draft Angles for Molding/Casting: Essential for easy part ejection from molds and dies.
Part Clamping: Ensure there are adequate, accessible surfaces for clamping the part during machining operations.
Tool Access: Design features that allow standard cutting tools to reach all areas without interference.
Mold Complexity: Minimize undercuts and side actions in injection molds, as these significantly increase mold cost.
DFM in Practice: Examples Across Manufacturing Processes

Let's delve into specific DFM considerations for common manufacturing methods:
DFM for CNC Machining
Internal Radii: Tools have radii. Avoid sharp internal corners; specify the largest possible internal radius to allow for larger, stronger, and cheaper end mills. A sharp internal corner in your CAD model will either be machined with the smallest possible tool, requiring multiple passes, or simply not achievable with standard tooling.
Pocket Depth-to-Width Ratio: Deep, narrow pockets are difficult to machine. They require long, slender tools that are prone to chatter and breakage, increasing machining time and cost. Consider alternative designs or splitting deep pockets into shallower ones.
Wall Thickness: Maintain consistent wall thickness where possible. Thin walls can vibrate during machining, leading to poor surface finish and inaccuracies.
Hole Features:
Standard Drill Sizes: Use standard drill bit sizes whenever possible to avoid custom tooling.
Hole Depth: Deep holes are harder to drill accurately and require pecking cycles, increasing time.
Threaded Holes: Specify standard thread sizes. Ensure adequate thread engagement length but avoid excessively long threads.
Under-cuts: Features that require special tools or multiple setups to machine, increasing cost. Can they be designed out?
Part Rigidity: Ensure the part is rigid enough to withstand clamping forces and cutting forces without deforming.
DFM for Injection Molding
Wall Thickness: Maintain uniform wall thickness to prevent warping, sink marks, and uneven cooling. If variations are necessary, make them gradual.
Draft Angles: Absolutely critical! Every surface perpendicular to the mold opening direction needs a draft angle (typically 0.5 to 3 degrees) to allow the part to eject cleanly without sticking or tearing.
Ribs and Bosses: Use ribs for stiffness and bosses for screw retention. Design them with appropriate thickness (typically 60% of the nominal wall thickness) and draft.
Undercuts: Features that prevent the part from being directly pulled out of a two-plate mold. They require complex and expensive side actions, slides, or core pulls. Minimize or eliminate them through clever design (e.g., using living hinges, snap-fits, or breaking a single part into multiple simpler ones).
Gate Location: Consider where the molten plastic will enter the mold. Poor gate placement can lead to flow lines, weld lines, and inconsistent filling.
Corner Radii: Avoid sharp corners as they create stress concentrations in the part and in the mold. Use generous radii.
DFM for Additive Manufacturing (3D Printing)
While 3D printing offers immense design freedom, DFM is still crucial.
Minimum Feature Size: Each printing technology has limitations on the smallest feature it can reliably produce (e.g., thin walls, small holes, intricate details).
Overhangs and Support Structures: Parts with significant overhangs (features extending without material underneath) will require support structures, which add material, print time, and post-processing effort for removal. Design to minimize or eliminate overhangs where possible.
Build Orientation: The orientation of the part on the build platform affects surface finish, strength, and support requirements.
Hollow vs. Solid: Hollowing out parts can save material and print time, but requires drain holes for powder-based processes.
Tolerances: While 3D printing can achieve good tolerances, they are generally not as precise as machining for critical features. Understand the achievable accuracy for your chosen process.
Internal Channels: While possible, consider the difficulty of post-processing and cleaning complex internal geometries for some processes.
The Payoff: Tangible Benefits of DFM

The proactive application of DFM principles delivers a cascade of benefits that directly impact your project's success and your company's bottom line:
Reduced Manufacturing Costs: This is often the most immediate and significant benefit. By optimizing designs for efficient production, you minimize material waste, reduce machine setup times, lower labor costs, and decrease the need for expensive specialized tooling. Fewer rejected parts and less rework also contribute to cost savings.
Faster Time to Market: Identifying and addressing manufacturing issues early in the design cycle prevents costly delays downstream. This means your product can move from concept to production more quickly, gaining a crucial competitive advantage.
Improved Product Quality and Reliability: Designs that are inherently manufacturable are less prone to manufacturing defects, assembly errors, and performance inconsistencies. This leads to higher quality products that meet specifications and perform reliably in the field.
Enhanced Innovation: While it might seem counterintuitive, DFM doesn't stifle innovation; it directs it. By understanding manufacturing constraints, designers can innovate within those boundaries, leading to more practical, elegant, and ultimately successful solutions. It encourages creativity in problem-solving rather than blindly pursuing unfeasible designs.
Stronger Supply Chain Relationships: When designers consistently deliver manufacturable designs, it builds trust and strengthens relationships with manufacturing partners and suppliers. This can lead to better pricing, faster turnaround times, and a willingness to collaborate on future projects.
Reduced Risk: Proactive DFM significantly reduces the risk of costly redesigns, production halts, and product recalls. It shifts the focus from reactive problem-solving to preventative action.
Resources for Mechanical Designers: Learning More About DFM
To truly bridge the gap, mechanical designers need continuous learning and access to valuable resources. Here are some real-world links to content that would provide real value to a target audience of mechanical designers looking to deepen their DFM knowledge:
The DFM Handbook for Machined Parts: A Practical Guide for Designers
This guide from ProtoLabs provides concrete, actionable advice for a common manufacturing method, directly addressing pain points designers face with CNC machining, including detailed guidelines on radii, wall thicknesses, and hole features.
Injection Molding Design Rules: Avoiding Common Pitfalls and Optimizing for Production
Injection molding is a complex process; this resource helps designers avoid expensive mold rework and part defects by covering essential aspects like draft angles, uniform wall thickness, and rib/boss design.
Additive Manufacturing Design Guidelines: Unleashing the Power of 3D Printing with Manufacturability in Mind
This guide helps designers leverage the unique capabilities of AM while understanding its practical limitations, preventing costly print failures by focusing on support structures, minimum features, and build orientation.
The Ultimate Guide to Tolerances and GD&T for Manufacturability:
GD&T is fundamental to mechanical design, and understanding the ASME standards and their application connects it directly to manufacturability, a crucial skill for designers. Many reputable training organizations offer courses that delve into applying tolerances effectively without over-constraining manufacturing.
Design for Assembly (DFA) Principles: Streamlining Your Product's Build Process
Boothroyd Dewhurst, Inc.: Design for Assembly (DFA) Software
DFA is a critical companion to DFM, ensuring that individual manufacturable parts can be efficiently put together. Their resources often detail part consolidation strategies and error-proofing techniques.
Material Selection for Manufacturability: Choosing the Right Material for Your Process
MatWeb provides a comprehensive database that helps designers compare materials based on their properties, which can be cross-referenced with machinability, moldability, and cost for various manufacturing methods. This encourages early, informed decisions.
Understanding Manufacturing Costs: A Designer's Guide to Cost Drivers:
Onshape Blog: What is Design for Manufacturing and Assembly?
Details how Design for Manufacturing and Assembly (DFMA) principles, supported by tools like Onshape, enable them to optimize product designs for easier production, reduced costs, and improved quality, which are critical aspects of successful mechanical design.
The Future of Design and Manufacturing: A Seamless Continuum

The journey towards truly bridging the gap between design and manufacturing is ongoing. As technologies evolve – from advanced simulation tools and AI-driven design optimization to increasingly sophisticated additive manufacturing processes – the lines between what's theoretically possible and practically manufacturable will continue to blur.
However, the fundamental principle of DFM will remain constant: a successful product is born not just from brilliant design, but from a design that inherently understands and respects the realities of its creation. It's about proactive thinking, continuous learning, and fostering a collaborative spirit that sees the entire product lifecycle as a single, integrated continuum.
For mechanical designers, embracing DFM isn't an optional add-on; it's a critical skill, a strategic imperative, and ultimately, the key to transforming innovative ideas from screen-bound visions into tangible, high-quality, and cost-effective realities. By tapping into diverse experience across various manufacturing processes, designers can anticipate and mitigate issues, transforming potential pitfalls into smooth production runs. The goal is to ensure your innovative designs aren't just aesthetically pleasing, but also practical, cost-effective, and truly ready for the real world.


Comments